I recently picked up a small LED display for around €20 at Action (The Netherlands). It’s one of those impulse buys you don’t really need, but immediately start imagining projects for. The hardware itself is fun, but the official mobile app… not so much. It works, but it feels limited, clunky, and not very inspiring.
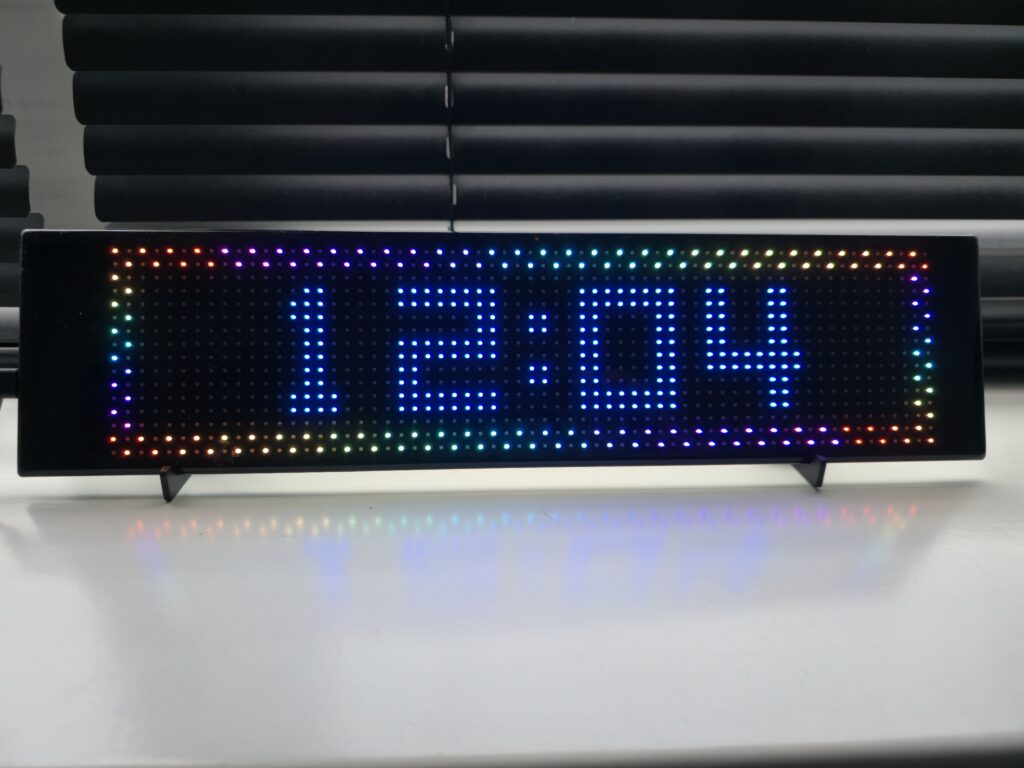
This also happens to be my very first blog post, so it felt like a good idea to start with something low-key, practical, and fun. The moment I started playing with this display, I began wondering: can I talk to this thing myself? Could I poke around the Bluetooth communication, reverse-engineer just enough of the protocol, and build something custom on top of it?
Full disclosure: I’m pretty much a n00b when it comes to Bluetooth, reverse engineering, and embedded protocols. That’s actually the whole point of this project. I want to learn by doing, experiment, break things, and slowly figure out how it all works — with a bit of help from AI along the way. This blog is mainly here to document that journey. If it helps others along the way, or if others help me when I get stuck, even better.
The Setup
For this project, I’m using a Raspberry Pi 3B+ as a small, remote working environment. This lets me tinker freely without messing up my main machine(s).
The goal is simple:
- Discover the LED display over Bluetooth
- Identify the correct device
- Connect to it reliably
- Explore its GATT services and characteristics
- Eventually send my own data instead of using the official app

Initial Bluetooth Scanning
Using the onboard Bluetooth adapter (from the Raspberry Pi), I started by scanning for nearby BLE devices:
For this i used the commands
bluetoothctl
scan on
This immediately showed a lot of devices — phones, TVs, random BLE beacons, and other IoT gear. To narrow things down, I filtered on:
- Strong RSSI (the display is physically very close)
- Consistent MAC address
- A custom BLE service UUID (0000a201-0000-1000-8000-00805f9b34fb)
Using a small Python script with bleak, I was able to confirm that the following device consistently showed up with that service:
A201 28:CE:A2:42:E3:85 rssi=-62 name=TY
At this point, I’m fairly confident this is the iPixel display.
Why Python and Bleak?
For this project, I chose Python as the main programming language and Bleak as the Bluetooth Low Energy (BLE) library.
The main reason is speed of experimentation. This project isn’t about building a polished application yet — it’s about exploring how the device behaves, inspecting data, and learning how BLE communication works in practice. Python makes it easy to write small scripts, run them, tweak them, and immediately see what changes.
Python also strikes a good balance between:
- being readable while learning
- having a rich ecosystem
- and staying close enough to the underlying system to debug things when they go wrong
For BLE specifically, Bleak is a good fit because:
- it provides a clean, asynchronous API for scanning, connecting, and interacting with GATT services
- it works directly on top of the native Bluetooth stack (BlueZ on Linux)
- it doesn’t hide too much — advertising data, RSSI values, UUIDs, and errors are all accessible
- it’s cross-platform, which keeps the code portable
In short: Python + Bleak gives me a practical, low-friction way to explore BLE behavior, collect data, and slowly build up an understanding of the protocol — without fighting the tooling more than necessary.
Once the protocol is understood, the tooling choice can change. For now, this combination is simply the most effective way to learn and experiment.
Setting Up the Development Environment
All experiments in this project are done using Python and the Bleak BLE library. To keep the system clean and avoid conflicts with Debian’s system Python, everything runs inside a virtual environment.
This setup is done on Debian 12 (Bookworm) running on a Raspberry Pi.
1. Install Python prerequisites
Debian protects its system Python environment (PEP 668), so we need the full Python installation and virtual environment support:
sudo apt update
sudo apt install -y python3-full python3-venv
This is a one-time step.
2. Create a virtual environment
From your home directory or project folder:
python3 -m venv ipixel-color
This creates an isolated Python environment in the ipixel-color directory.
3. Activate the virtual environment
source ipixel-color/bin/activate
Your shell prompt should now look similar to:
(ipixel-color) x@raspberrypi:~ $4. Verify the environment is active
Do not skip this step — it prevents subtle and confusing errors later.
which python
which pip
Expected output:
/home/x/ipixel-color/bin/python
/home/x/ipixel-color/bin/pip
If you see /usr/bin/python or /usr/bin/pip, the virtual environment is not active.
5. Install Bleak
With the virtual environment active:
pip install --upgrade pip
pip install bleak
To be completely explicit (and avoid any ambiguity):
./ipixel-color/bin/python -m pip install bleak
6. Quick sanity check
python -c "import bleak; print(bleak.__version__)"
7. Leaving the environment
When you’re done experimenting:
deactivateNotes
- Never install Python packages system-wide on Debian using pip
- Always activate the virtual environment before running scripts
- All Python examples in this project assume the virtual environment is active
With the environment set up, we can now start exploring the Bluetooth behavior of the display.
Python Scripts
scan_a201.py
To find iPixel/Funscreen devices by A201 service
#!/usr/bin/env python3
import asyncio
from bleak import BleakScanner

A201 = "0000a201-0000-1000-8000-00805f9b34fb"

def cb(device, adv):
    uuids = [u.lower() for u in (adv.service_uuids or [])]
    if A201 in uuids:
        name = device.name or adv.local_name or "?"
        print(f"A201  {device.address}  rssi={adv.rssi:4d}  name={name}")

async def main():
    scanner = BleakScanner(detection_callback=cb)
    await scanner.start()
    await asyncio.sleep(10)
    await scanner.stop()

asyncio.run(main())
Run:
python scan_a201.pyconnect_only.py
minimal connect test (no service discovery)
#!/usr/bin/env python3
import asyncio
from bleak import BleakClient

ADDR = "28:CE:A2:42:E3:85"  # replace with your device MAC

async def main():
    client = BleakClient(ADDR, timeout=15.0)
    print("Connecting...")
    await client.connect()
    print("Connected:", client.is_connected)
    await asyncio.sleep(0.2)
    await client.disconnect()
    print("Disconnected")

asyncio.run(main())
Run:
python connect_only.pyOptional:
scan_all.py
quick “what’s nearby” scan (useful once)
#!/usr/bin/env python3
import asyncio
from bleak import BleakScanner

def cb(device, adv):
    name = device.name or adv.local_name or "?"
    rssi = adv.rssi
    print(f"{device.address}  rssi={rssi:4d}  name={name}")

async def main():
    scanner = BleakScanner(detection_callback=cb)
    await scanner.start()
    await asyncio.sleep(10)
    await scanner.stop()

asyncio.run(main())
Run:
python scan_all.pyThe Problem: Connecting Fails
While scanning worked perfectly, connecting did not.
Every attempt to connect — using bluetoothctl, gatttool, or Python (bleak) — resulted in timeouts or aborted connections:
org.bluez.Error.Failed le-connection-abort-by-localor:
asyncio.exceptions.TimeoutError
Even a minimal connection test failed:
await client.connect()
This strongly suggests that the problem is not the device, but the Bluetooth stack.
Why the Onboard Bluetooth Isn’t Enough
The Raspberry Pi 3B+ uses an onboard Bluetooth controller that relies on the Linux BlueZ stack. Unfortunately, this combination is known to be unreliable with certain low-cost BLE devices, especially those using custom or non-standard implementations.
In short:
- Scanning works
- Advertising data is visible
- RSSI is strong
- But GATT connection setup fails
This is a classic symptom of BLE compatibility issues, not bad code.
The Workaround: External Bluetooth Adapter
To move forward, I ordered a Bluetooth 5.x USB adapter from Amazon:

Today, the adapter arrived by post, and this is where things get interesting.
The plan is to:
- Disable the onboard Bluetooth
- Switch fully to the USB adapter
- Re-run all scans and connection attempts
- Dump the GATT services once a stable connection is established
Disabling onboard Bluetooth on the Raspberry Pi:
sudo vi /boot/firmware/config.txtAdd:
dtoverlay=disable-bt
Then reboot:
sudo reboot
After that, the USB adapter will become the primary Bluetooth interface.
What’s Next
Now that the hardware side is sorted, the real fun begins:
- Verifying stable BLE connections
- Exploring GATT characteristics
- Watching how the official app talks to the display
- Sending my own payloads
This is where the actual reverse-engineering starts.
Verifying Which Bluetooth Adapter Is Active after reboot
Before trying to connect to any BLE device, it’s critical to confirm which Bluetooth adapter BlueZ is actually using.
On a Raspberry Pi, this matters because:
- The Pi may have onboard Bluetooth
- We also have a USB Bluetooth adapter
- BlueZ can see both, but will silently choose one as default
- All tools (bluetoothctl, Bleak, Python scripts) use only the default adapter
If we don’t verify this, we might be debugging the wrong hardware.
1. List all Bluetooth controllers
sudo bluetoothctl listWhy this command?
This asks BlueZ: “Which Bluetooth controllers do you currently know about?”
Each entry represents a physical Bluetooth adapter (onboard or USB).
Example output:
Controller B8:27:EB:A3:0D:9A raspberrypi #1 [default]
Controller 08:8A:F1:21:FF:01 raspberrypi
What we’re looking for:
- How many controllers exist
- Which one is marked [default] → this is the one actually being used
2. Inspect the active (default) controller
bluetoothctl showWhy this command?
This shows detailed information about the currently selected controller.
Relevant output:
Controller B8:27:EB:A3:0D:9A (public)
Name: raspberrypi #1
Powered: yes
Modalias: usb:v1D6Bp0246d0542
Why this matters:
- Powered: yes → the adapter is active
- Modalias: usb:… → confirms this controller is USB-based
- This tells us we are not using the onboard UART Bluetooth
At this point we know:
All BLE scans and connections are going through the USB Bluetooth adapter.
3. Why this step is important
Many BLE problems look like software bugs but are actually caused by:
- flaky onboard Bluetooth chips
- UART timing issues on Raspberry Pi
- BlueZ using a different adapter than expected
By confirming the adapter first, we eliminate an entire class of problems before debugging BLE behavior or writing more code.
4. Optional: explicitly select the adapter
If you want to be extra explicit (or if multiple adapters exist):
bluetoothctl
select B8:27:EB:A3:0D:9A
show
Why do this?
This forces BlueZ to use a specific controller and removes ambiguity.
It’s useful in multi-adapter setups or when switching between onboard and USB Bluetooth.
Summary
At this stage we have confirmed that:
- The USB Bluetooth adapter is active
- BlueZ is using it as the default controller
- Python and Bleak are talking to the correct hardware
This means any remaining issues are now device-level BLE behavior, not system misconfiguration.
Leave a Reply